
The tradition of chocolate salami is rooted in Italian and Portuguese origins. The name is a bit gimmicky, alluding the notion that you might find meat by-products in the roll. But truthfully, the name comes from the chunks of biscuit, nut, and fruit that mimic the pockets of fat in a traditional salami. No meat here! Just a delicious dessert.
Chocolate Salami is traditionally made with high-quality dark chocolate and a combination of milk, butter, eggs, and liquor, then studded with crispy biscuits, fruits, and nuts. The resulting chocolate mixture reminds me of a ganache filled truffle, enhanced with the crunchy bits. It is equally decadent and indulgent.
I’ve simplified the recipe to leave out the raw eggs. I didn’t feel like they added enough to the mixture to deal with the hassle of separating yolks from the whites, whipping it all together, and fearing salmonella contamination. So, be gone with them!
And that is the beauty of this recipe. It’s really more of a ratio, allowing you to customize your recipe to your preferences (or what you have hiding in your pantry). Keep the chocolate+butter+milk mixture the same and add your desired chunks of nuts and fruit.
Chocolate
Starting with the chocolate, I prefer a semi-sweet chocolate. But you can replace that with bittersweet, milk, or white chocolate, with delicious success. I recommend using a couverture chocolate in this application. Made with cocoa butter, couverture chocolate will impart the rich taste and creamy texture that is desired in a Chocolate Salami. And there is no need to worry about tempering the chocolate, because you are mixing it with the butter and milk. So! You get to take advantage of the high-quality features of the chocolate with out dealing with the fusiness of tempering!! (Want to learn more about kinds of chocolate? Visit this post!)
Milk & Butter
Next, let’s talk milk. I’ve made this recipe with a variety of milks – whole milk, evaporated milk, and heavy cream – all resulting in a fabulous Chocolate Salami. My next experiment is going to be coconut milk. I’m feeling positive it’s going to delicious. The secret is in the amount of milk. 6 Tablespoons is the perfect amount – creamy and soft!
The butter is easy peasy!!! Salted or unsalted, it doesn’t make a big difference. You just need 6 Tablespoons (3/4 a stick).
Biscuits
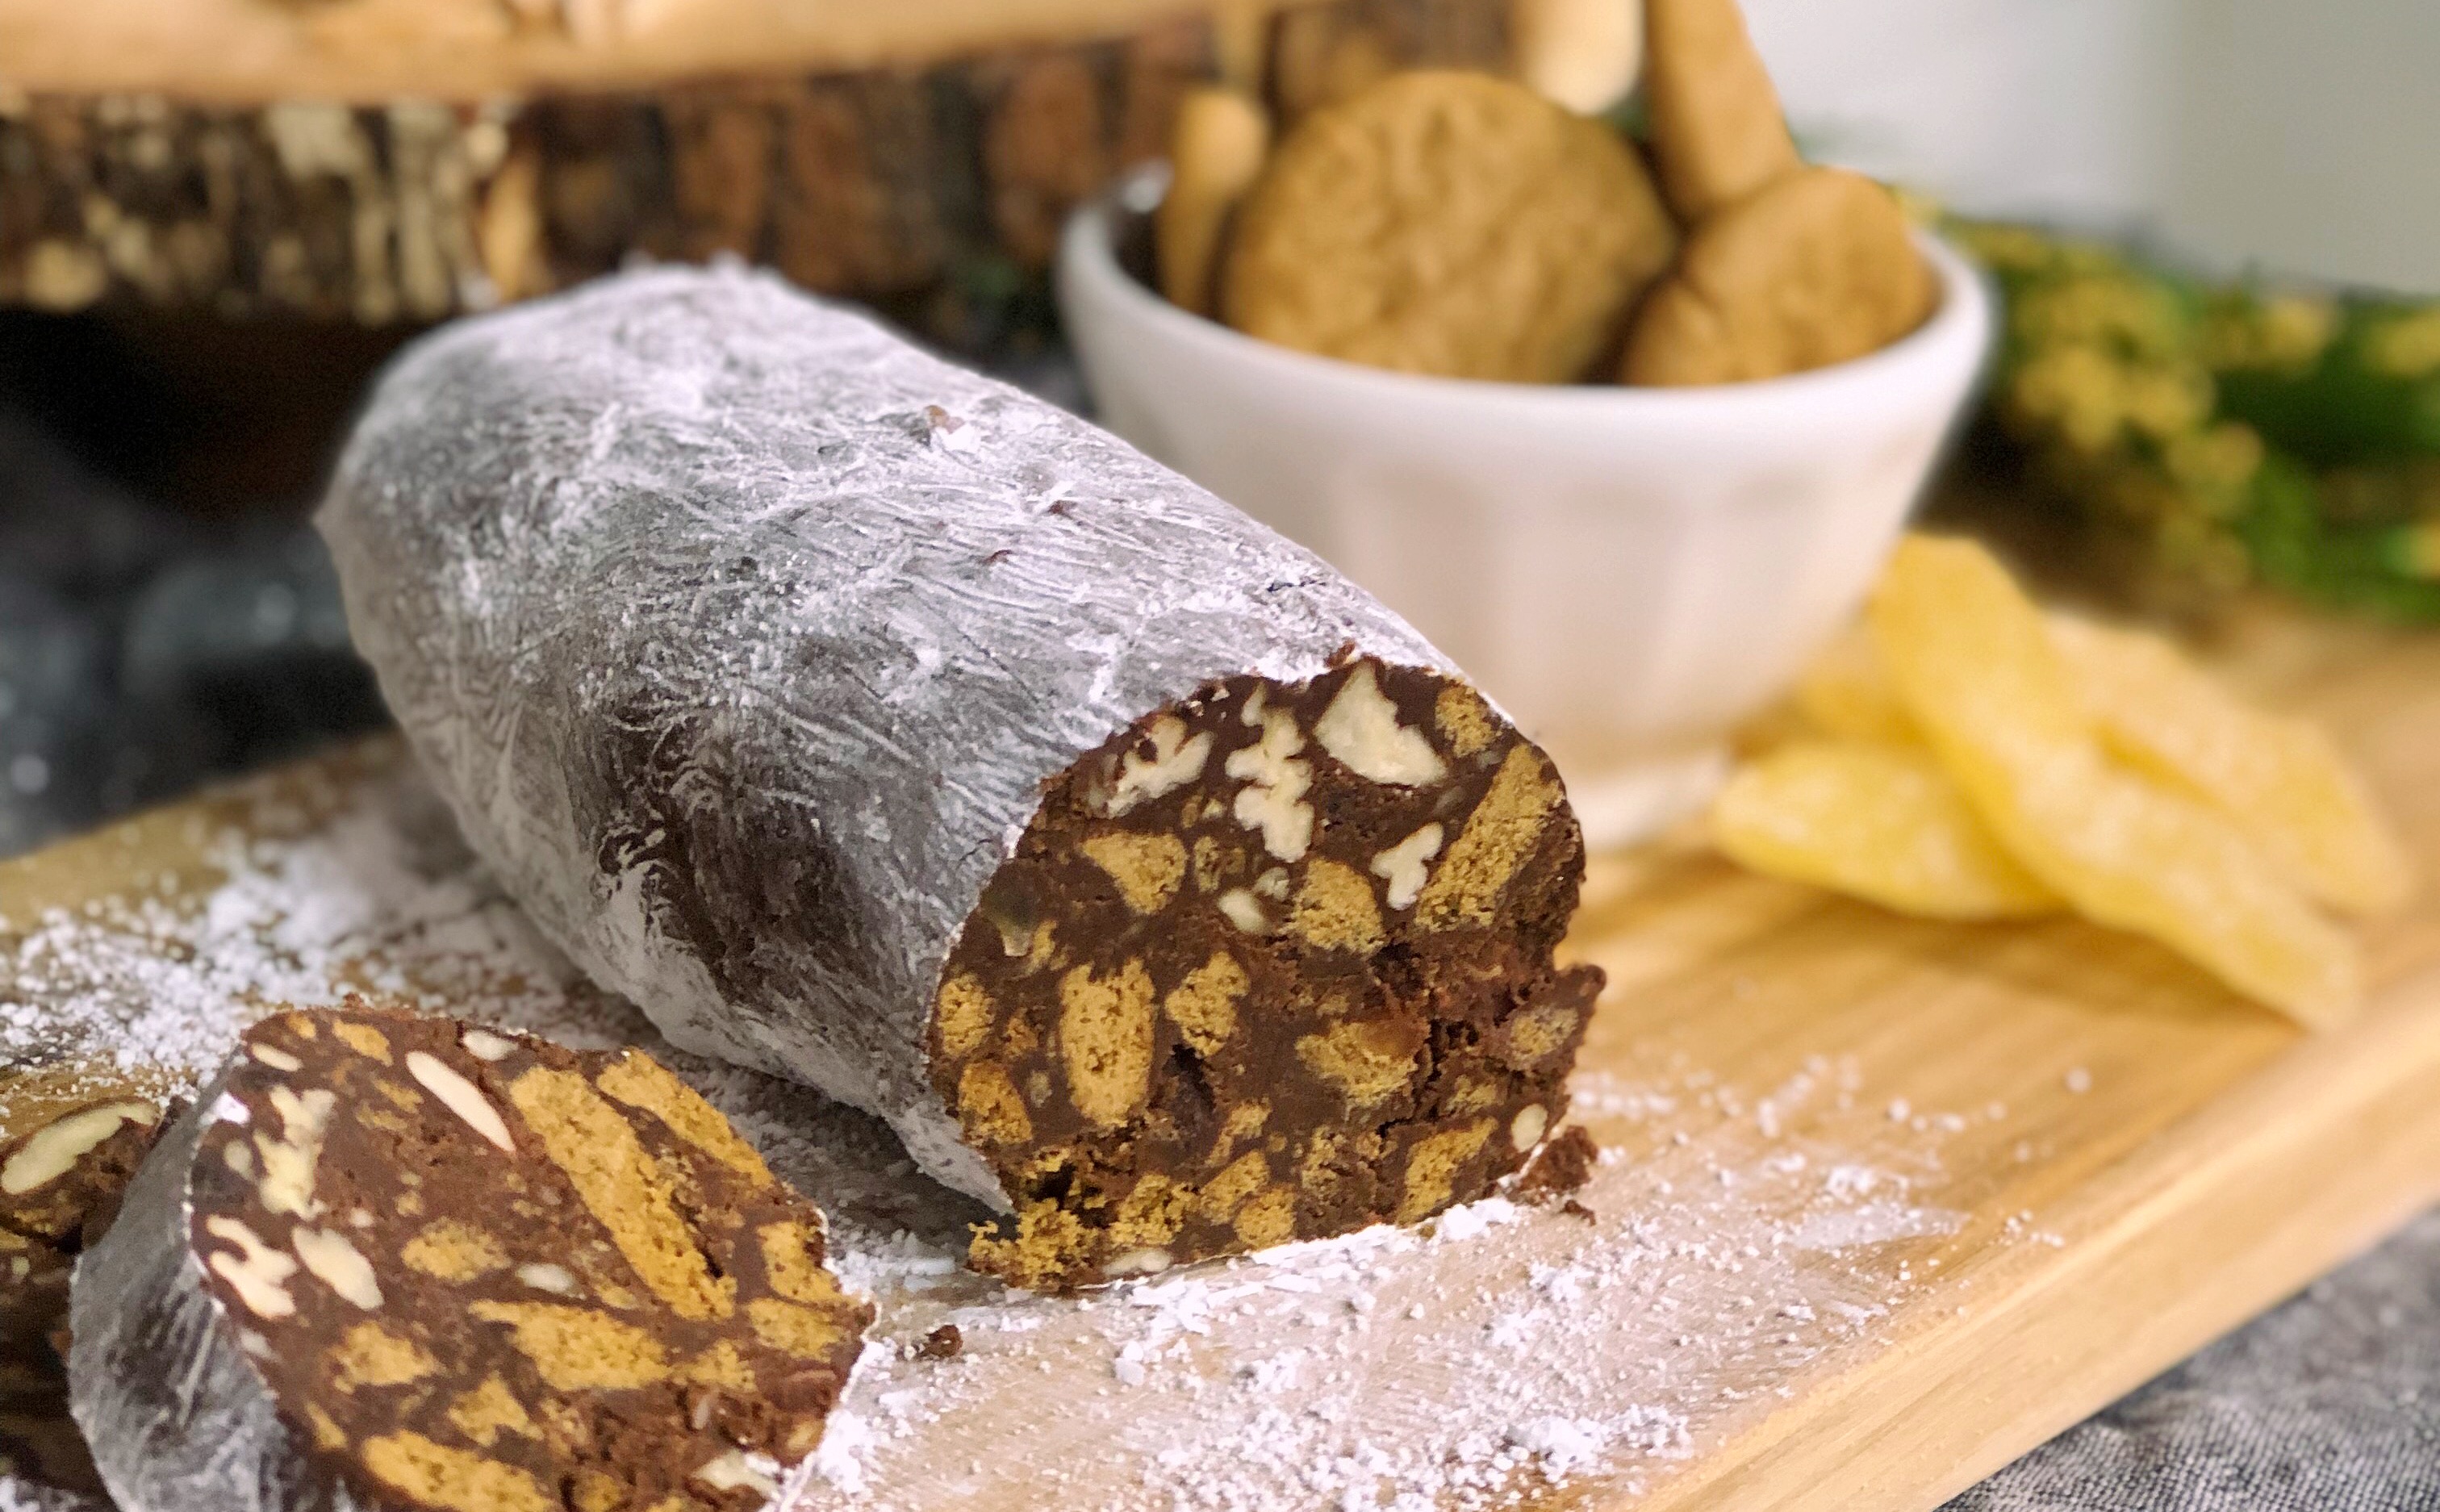
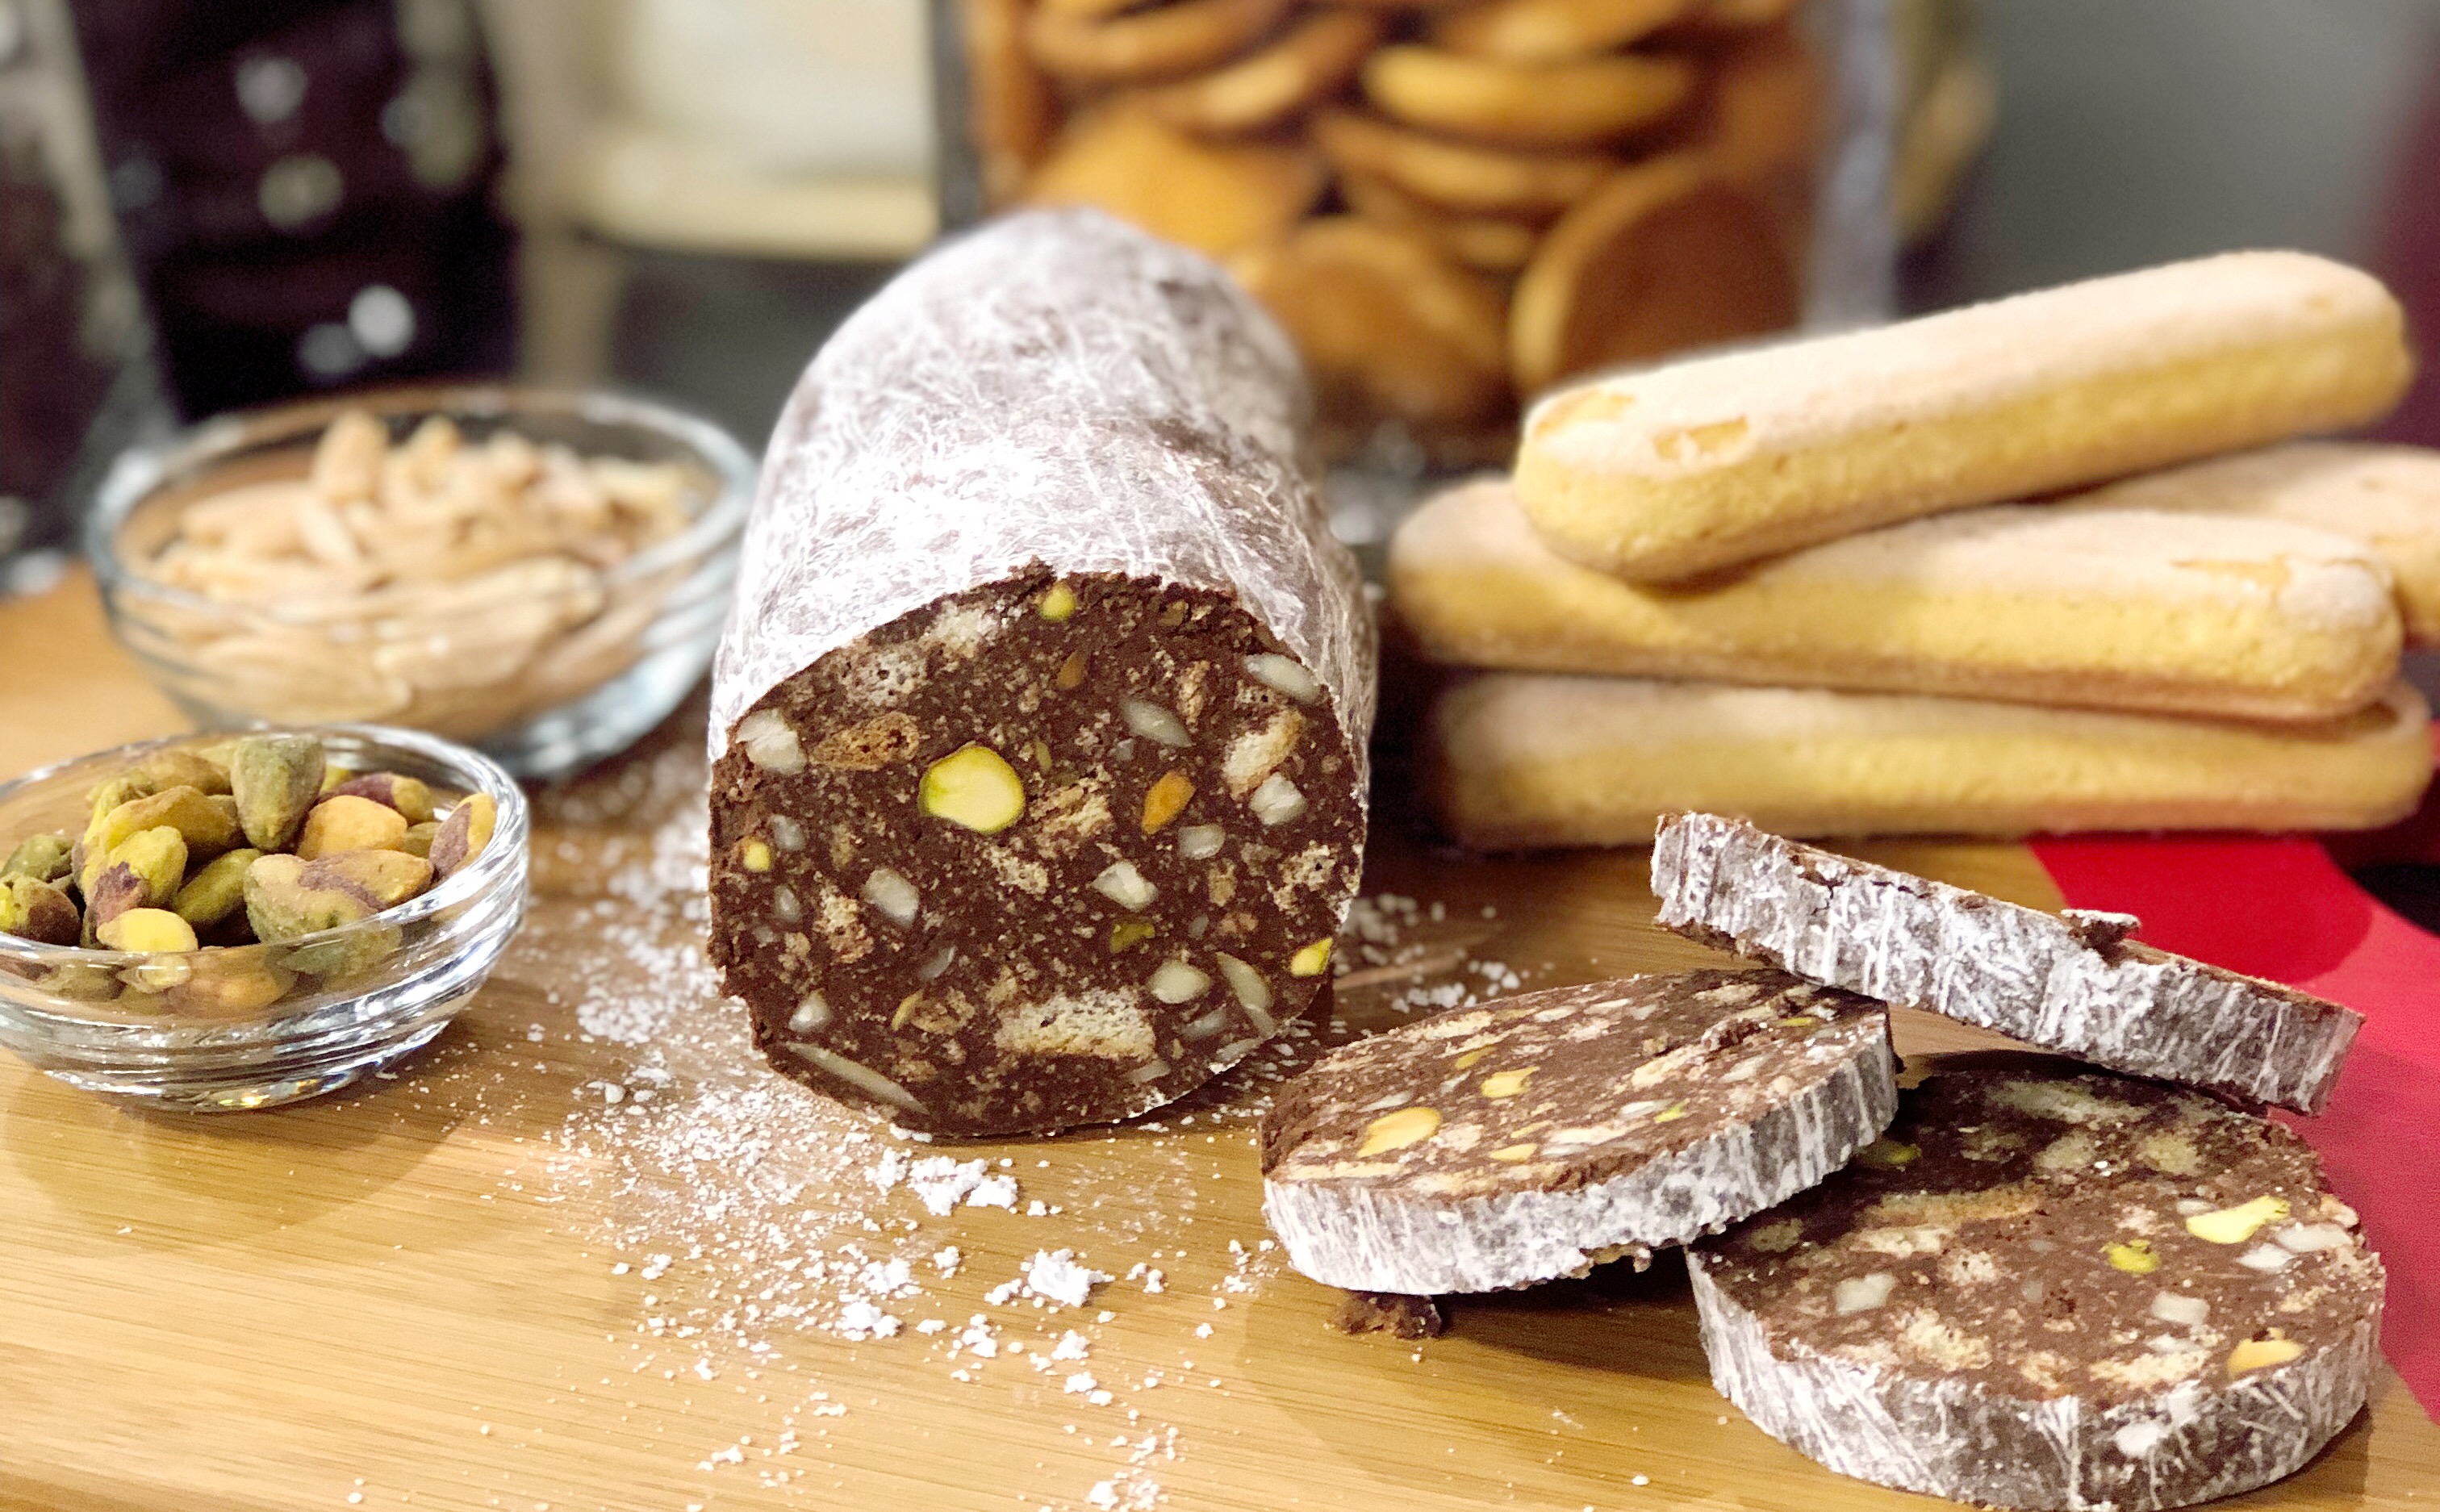
Now, let’s talk biscuits. The earliest mention I can find of Chocolate Salami recommends the use of Lady Fingers. But I have seen a huge variety of biscuits – biscotti, Maria’s biscuits, digestives, vanilla wafers, graham crackers! In my experiments, they all had equal success! The biscotti and lady fingers are bigger biscuits, which allow for larger chunks of biscuit. But the biscuit I reach for most often is a vanilla wafer – they are easy to find and inexpensive! In the end, you just need a crispy, crunchy biscuit! I measure my biscuits in a liquid measuring cup – 3 cups of large chunks is the perfect amount. Then pour them into a gallon sized bag and run over them with a rolling pin. Break them into the size you prefer! I like it to be a craggy rubble – a mix of biscuit dust, small chunks, and medium-small chunks! 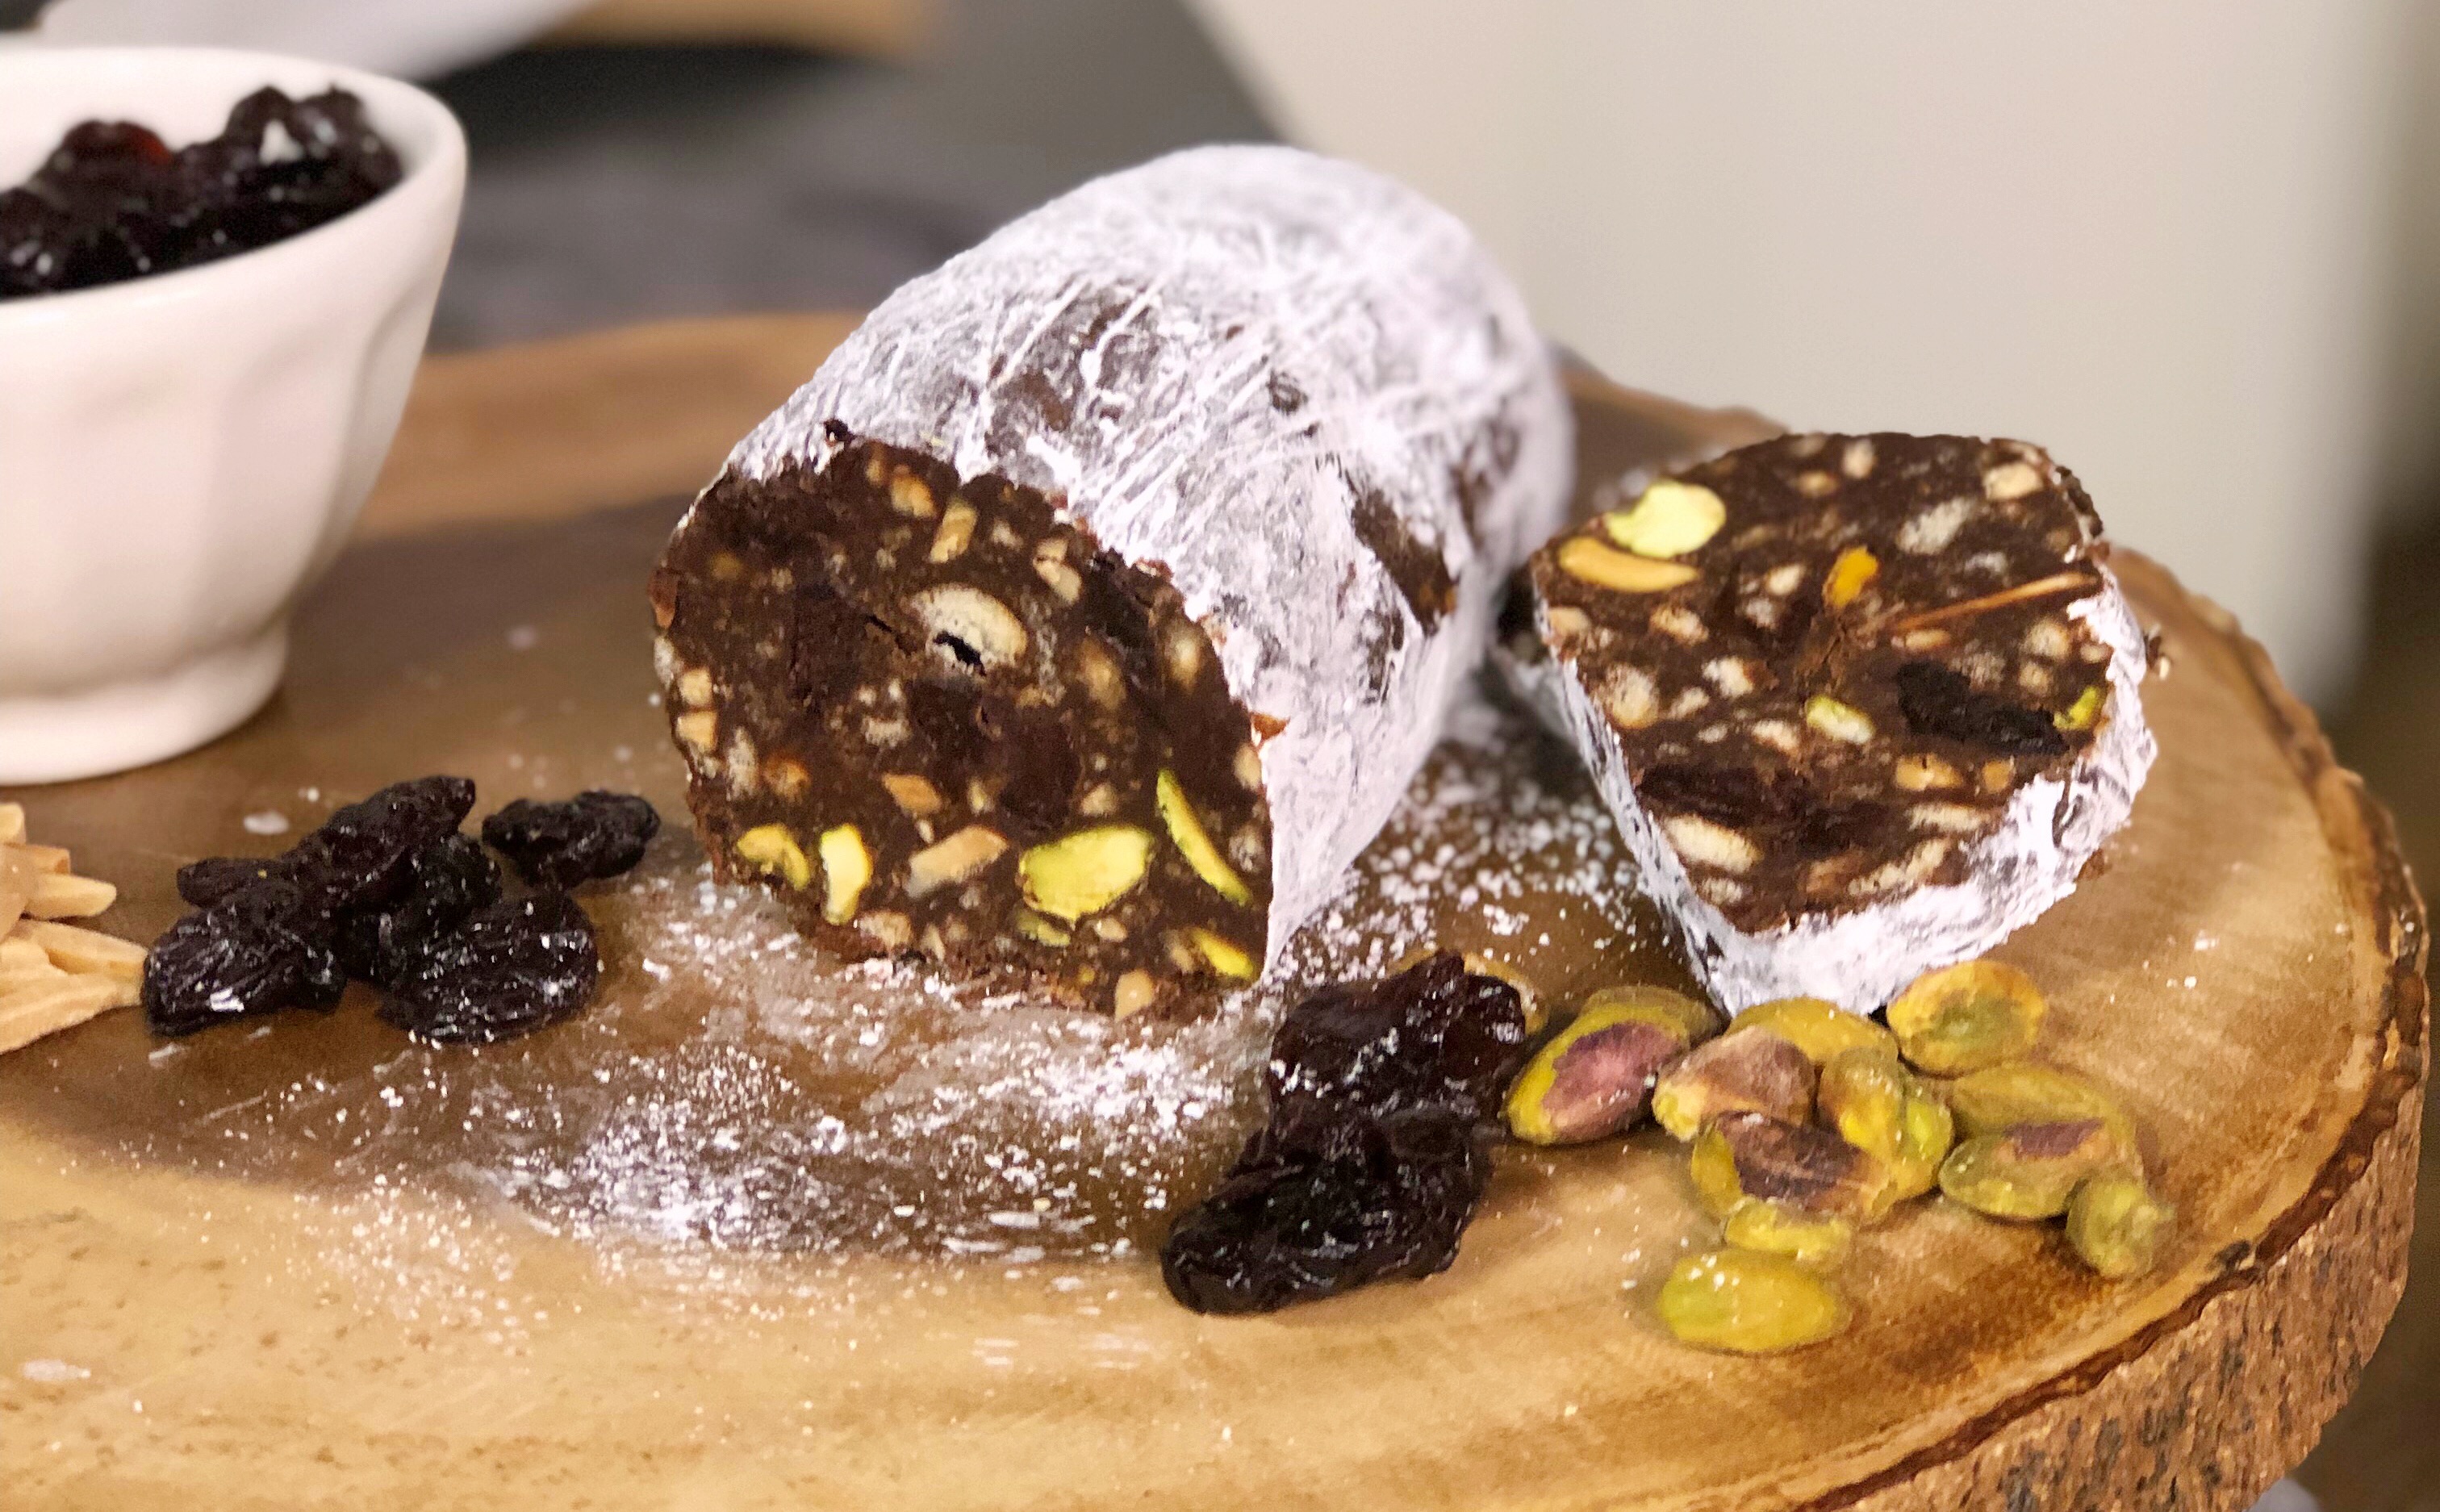
Fruit & Nuts
Let the fun begin! Following the basic ratio (3/4 cup nuts and 1/2 cup dried fruit) you can create any combination of flavors! A simple beginner’s recipe is slivered almonds, leaving out the fruit! From there, try adding some dried cranberries. Then go crazy with half almonds, half pistachios. Haha.
Here are few fun combinations:
- Ginger Pecan – 1 cup milk chocolate, 3 cups gingersnaps, 3/4 cup pecans, 1/8 cup finely chopped crystallized ginger
- Hawaiian – 1 cup semi sweet chocolate, 3 cups vanilla wafers, 3/4 cup macadamia nuts, 1/2 cup coconut
- Chocolate Orange – 1 cup semi sweet chocolate, 3 cups vanilla wafers, 3/4 cup slivered almonds, 2 T orange zest
- Christmas Cherry – 1 cup white chocolate, 3 cups vanilla wafers, 1/4 cup slivered almonds, 1/2 cup pistachios, 1/2 cup dried cherries
You can leave the nuts whole or chop them up a bit – just decide how big you want the chunks to be! I like enhanced flavor of a toasted nut, so I toast them on a sheet pan for a few minutes (400* F for about 10-15 minutes, stirring every 5 minutes. Watch them carefully!)
I also like to microwave the dried fruit for 30 second with a Tablespoon of water to help soften them up, but you don’t have to! So many options!!
I can’t wait to come up with more combinations!
Liquor
If you fancy a little kick of liquor, a couple tablespoons of rum, Amaretto, Kahlua, or brandy ought to do the trick. Obviously, just save those rolls for the adults. Add the liquor to the chocolate, butter, milk mixture then add your other goodies.
Packaging Chocolate Salami
Have fun with the final step of the chocolate salami. Wrapping in string or parchment paper will continue with salami narrative! Adding a little handmade label will give you recipients a clue of what they are eating. They are going to be pleasantly surprised!
If you want to tie your Chocolate Salami like a traditional salami, watch this video and wrap your Chocolate Salami in the same manner. 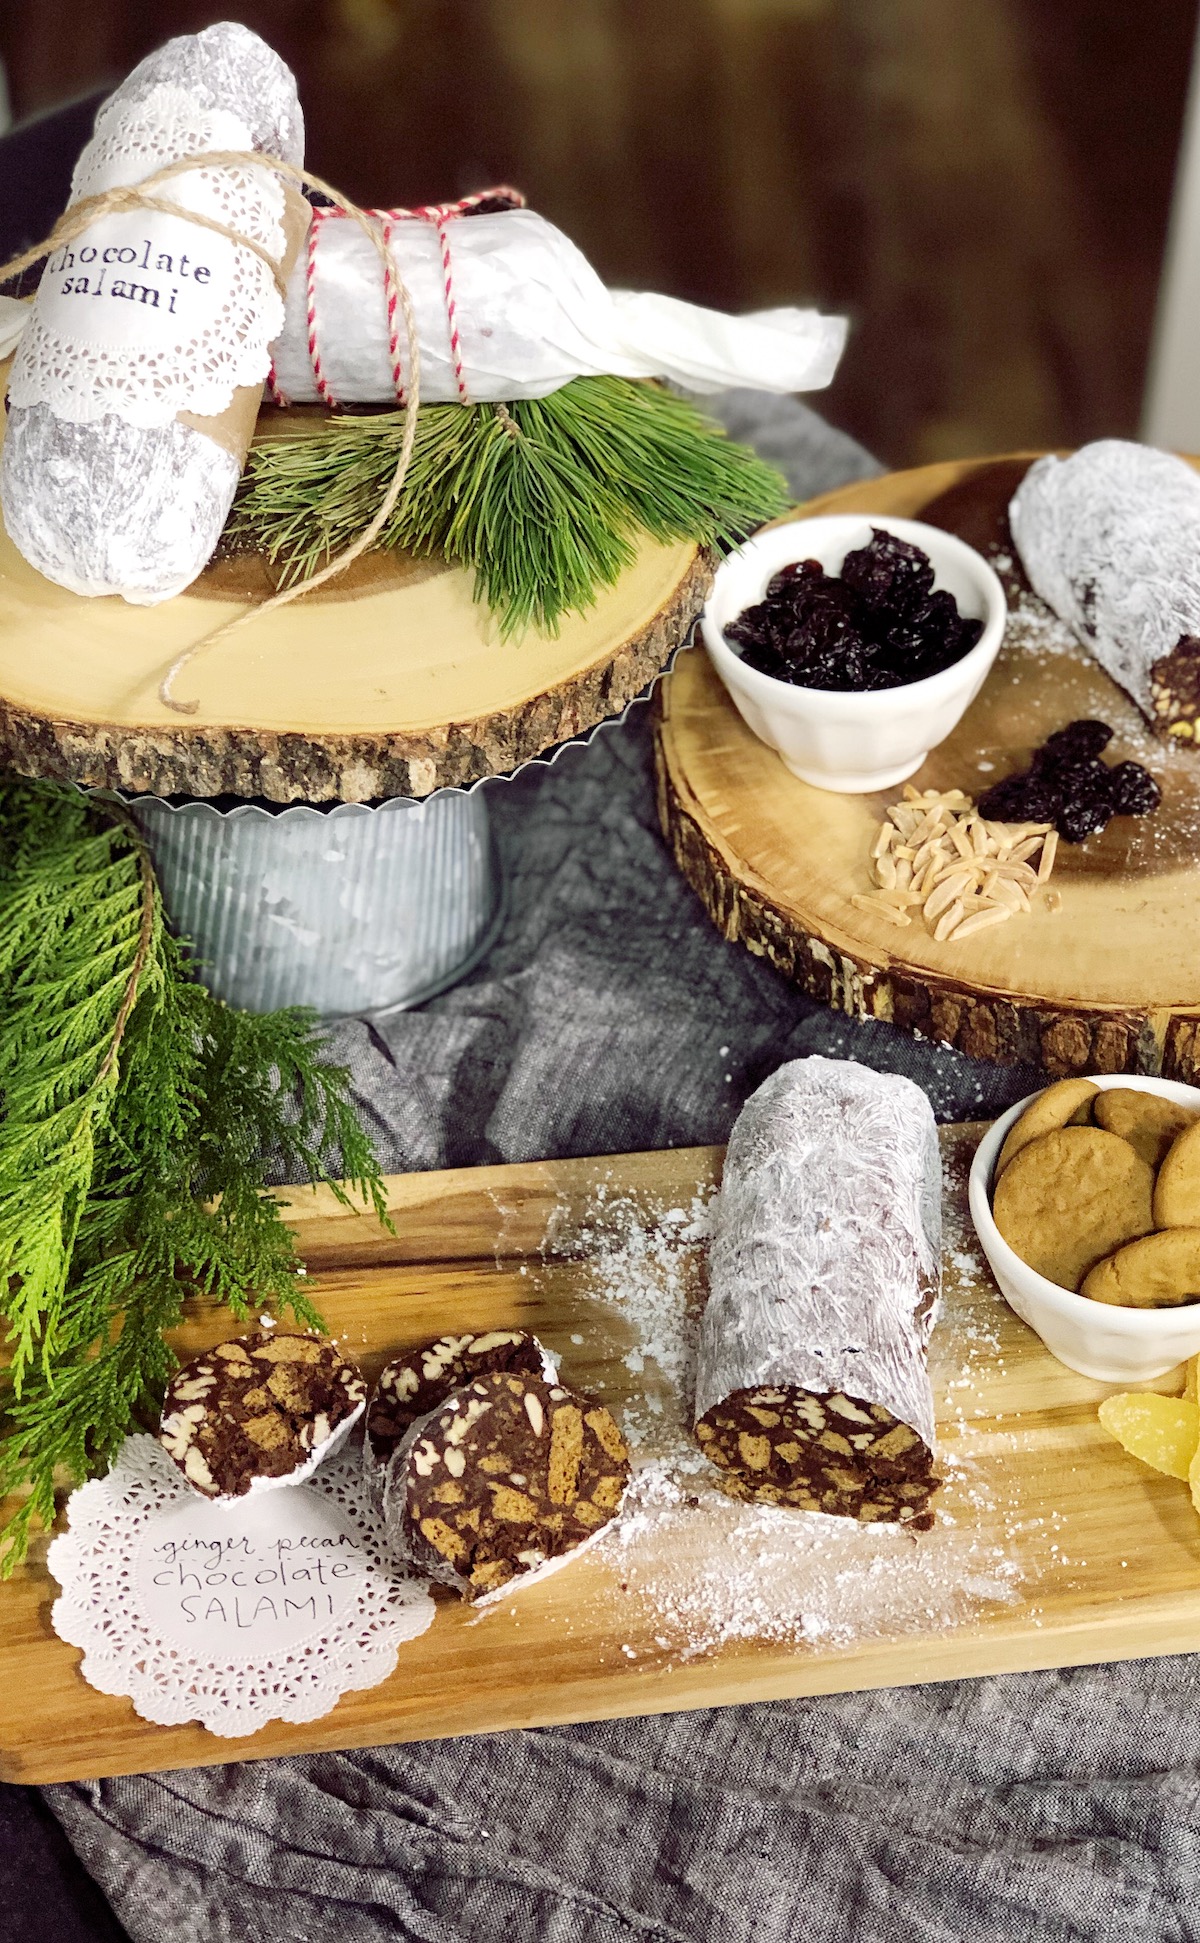
Final Thoughts
I have loved experimenting with chocolate salami. In the last week, I have made this recipe 12 times!!! It is so easy – requires no baking! Just a little measuring and mixing! And it leaves a lasting impression. Sharing the Chocolate Salami with the crew at Studio5 was a highlight – they were impressed by the unique look, but even more impressed when they ate it! Creamy and flavorful. So good.
I can’t wait to share these with my neighbors and friends! Let me know if you have any questions before you embark on your own Chocolate Salami adventure.
Chocolate Salami
 (No Ratings Yet)
Chocolate Salami has long been adored by Italian and Portuguese families. And for good reason! Creamy chocolate is studded with biscuits, fruit and nuts. Yum.
Ingredients
- 1 cup couverture chocolate (semisweet, milk, or white)
- 6 Tablespoons butter, cut into chunks
- 6 Tablespoons milk
- 2 T liquor OPTIONAL (rum, brandy, Kahlua, Amaretto)
- 3 cups biscuits broken into large chunks (vanilla wafers, gingersnaps, biscotti, amaretti, lady fingers, digestives)
- 3/4 cup toasted nuts (almonds, pecans, walnuts, macadamia, pistachio, cashew)
- 1/2 cup dried fruit (cherries, cranberries, coconut, ginger, apricot)
- 2 T citrus zest OPTIONAL (orange, lemon, lime, grapefruit)
- powdered sugar for dusting
Instructions
Place chocolate and butter in a microwave safe bowl. Melt in 30 second increments, stirring between each interval.
When chocolate and butter are melted, add milk and liquor (if using). Stir well.
Place biscuits in a gallon sized bag and roll a rolling pin over them, crushing them until the resemble rubble. There should be some crumbs, but also some small and medium sized pieces.
Chop nuts and dried fruit into small pieces.
In a medium sized mixing bowl, combine crushed biscuits, fruit, and nuts. Toss together.
Pour chocolat? mixture over biscuit mixture and stir well. Place mixture in the fridge for 15 minutes. Don't leave it in there too long or it will be hard to form into a log.
Lay a large piece of plastic wrap out on the counter. Pour half of the mixture in the middle of the plastic wrap. Roll both ends lengthwise over the chocolate mixture, starting the formation of the log. Twist the ends of the plastic wrap by rolling the log a several times on the counter. Push the mixture into the shape of a log. Place in the fridge at least four hours to let completely harden. Repeat with other half of chocolate mixture.
Pour about 1/2 cup powdered sugar in a pan large enough to lay the chocolate salami in.
Remove log of chocolate salami from the fridge and unwrap. Place in the pan of powdered sugar. Using a pastry brush, dust the log with powdered sugar, using more sugar if necessary.
Serve immediately or wrap chocolate salami in plastic wrap and keep in fridge
Notes
Chocolate Salami will keep for 1 week in the fridge or 3 months in the freezer.


No Comments