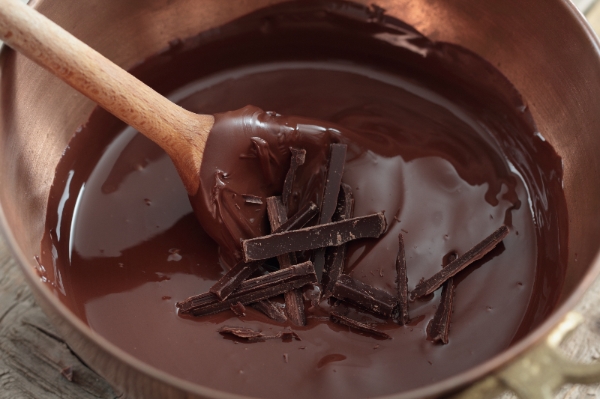
Tempering is the process required to give all chocolate creations using couverture chocolate that extra snap, shine, and sheen that makes your chocolate treats irresistible.
When couverture chocolate is melted, the cocoa butter molecules melt and become unstable. By tempering, you are rebuilding the cocoa butter crystals. There are multiple ways to temper chocolate – tabling (mush) method, seed method with chocolate or mycryo (powdered cocoa butter) – melting with a double boiler, in the microwave, oven, or in a tempering machine.
We want to simplify this somewhat overwhelming process, and we’ll stick with the easiest way to temper: in the microwave with seed chocolate- this process seems to be the quickest, requires the least amount of stuff, and allows for the the most control.
Don’t be intimidated by the tempering process; we’re here to show you how easy it truly is!
Tempering with Seed Chocolate
Here’s what you’ll need:
- Couverture chocolate (high quality chocolate containing higher percentage of cocoa butter)
- Silicone, microwave-safe bowl
- Spatula
- Thermometer
- Pour 2/3 of your chocolate wafers or chopped pieces of chocolate in your plastic bowl and microwave on half power. Monitor your chocolate between heating and stir after 1 minute intervals. Melt the chocolate to the desired “Heat to Temperature.”
Chocolate Temperatures
| Flavor | Heat to Temperature | Use at Temperature |
| Dark | 115 – 120 | 89 |
| Milk | 110 – 115 | 86 |
| White | 110 | 84 |
2. Add in the remaining 1/3 of chocolate, which are tempered pieces of the original chocolate before it was melted. You can add wafers, or a large chunk of chocolate from a block. Stir this “seed” chocolate around in the bowl to help agitate and cool down your melted chocolate. Continue stirring to ensure the seed chocolate is cooling the bowl of chocolate to the tempered, “Use at Temperature.”
3. When you’ve reached your “Use at Temperature” you can remove any pieces of chocolate still in the bowl. Or if there are small lumps left in the bowl, you can cool the chocolate to 78 degrees and then warm it up again- warm it slowly and keep the temperature below the “use at temperature.”
4. You’ll always want to test your chocolate by dipping the tip of a knife or a small strip of parchment paper into the chocolate. Wait 2-3 minutes to ensure there’s proper snap and sheen to the chocolate. If the chocolate isn’t set after a few minutes, test the temperature to make sure the chocolate is still in the appropriate temperature range. If it is too hot, you may need to add a little more seed chocolate to lower the temperature. If the chocolate was the right temperature, then the chocolate may have cooled too slowly. Test it again and place the test strip in the fridge and see if the chocolate is in temper.
5. Once the test strip is successful, you can use your chocolate as you want and enjoy that perfect snap, shine and sheen.
6. If your test strip is not successful and your chocolate isn’t in temper, just start the process over! Melt it to the “Heat to Temperature” then cool it down again to the “Use at Temperature” with your seed chocolate. You won’t hurt the chocolate to temper it over and over again!
7. Your chocolate may start to harden while using it, if you heat it slowly, but keep it under the “use” temperature, the chocolate will stay in temper. Some people keep their bowl over a pan of boiling water, or you can use an electric heating pad to place under your bowl of chocolate to keep it warm and in temper. If we reheat the chocolate, we like to test the temper before using it again.
A few warnings:
- The ideal temperature of the room when working with chocolate is between 68 to 72°F (20 and 22°), and low humidity.
- When cooling and hardening your melted chocolate work, 65°F room is recommended. You can refrigerate your chocolate to harden, but it will make the chocolate softer and less crisp, although it may be needed on a hot day.
- Chopping your chocolate into small uniform pieces helps it to melt evenly or you can use wafers.
- Always use tempered chocolate as your “seed” chocolate. The cocoa butter needs the stable crystals to build upon from the tempered chocolate. When you buy wafers, or a block, the chocolate is in temper and can be used as your seed chocolate.
- If using a double boiler, the water should not exceed 140°F. The water should not touch the bottom of the bowl containing the chocolate. The chocolate should be carefully watched and stirred to prevent overheating. An instant-read thermometer is a must when melting chocolate.
- Do not heat chocolate over 120°F! This will change the flavor of your chocolate and likely burn it. Remove chocolate from the heat source when it reaches 115°F and continue stirring to distribute the cocoa butter evenly.
- White and milk chocolate should be frequently stirred while melting because they contain milk solids that lump if left unmixed.
- Chocolate and water are enemies! Steam or liquid water should not come in contact with chocolate. Water causes the chocolate to “seize” and become lumpy.
- Tempering is only needed for chocolate candies, molded chocolates or chocolate decorations. No need to temper mousses, creams, ganache or baking; just simply melt and go!
- A bowl of chocolate can be tempered as many times as you need. Don’t throw out a bowl of chocolate because you’ve used it, just melt the chocolate down again and re-temper it to use it again.
- Store chocolate at 56-60°F. No need to refrigerate and keep your chocolate away from any smelly foods.
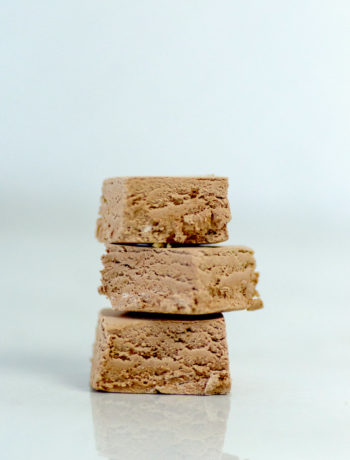
Here’s what to look for in your tempered chocolate:
| Properly Tempered Chocolate | Improperly Tempered Chocolate |
| Shiny/glossy surface | Dull finish |
| Even color | Spotted in color |
| Good snap | Poor snap |
| Smooth texture | Soft, uneven texture |
| Good Contraction when removing from mold | Poor Contraction when removing from mold |
| No Bloom | Fat bloom on surface |
There are three critical elements to tempering chocolate. These three principles are what affect the type, size and number of cocoa butter crystals being formed during chocolate tempering. They are:
1. Temperature: Critical because cocoa butter crystals both form and melt at specific temperatures. So tempering chocolate must be done with exact temperatures. Using a fast
2. Time: Necessary for cocoa butter crystals to form and grow, you really can’t rush the tempering process. It will just take some time for those crystals to form.
3. Agitation: Needed to ensure the cocoa butter crystals are well distributed within the melted chocolate and to prevent their premature growth. If the chocolate is cooling around the edges faster than in the middle, then your chocolate won’t be evenly tempered. You MUST stir and keep the chocolate moving in order for the temper to be successful!
. . . . . . . . . . . . . . . . . . . . . . . . . . . . . . . . . . . . . . . . . . . . . . . . . . . . . . . . . . . . . . . . . . . . . . . . . . . . . . . . . . . . . . . . .
Read our Troubleshooting guide to help you if you run into some problems with your chocolate.
Want to learn more about chocolate? Read our Chocolate 101 post.
All of this sound like too much work? We also love using COMPOUND chocolate- which doesn’t require tempering. Learn more about this fail-safe way to dip with chocolate.
Printable Tempering Guide
Temper your own bowl of chocolate with Connie and Heather!
. . . . . . . . . . . . . . . . . . . . . . . . . . . . . . . . . . . . . . . . . . . . . . . . . . . . . . . . . . . . . . . . . . . . . . . . . . . . . . . . . . . . . . . . .
Read our Troubleshooting guide to help you if you run into some problems with your chocolate.
Want to learn more about chocolate? Read our Chocolate 101 post.
All of this sound like too much work? We also love using COMPOUND chocolate- which doesn’t require tempering. Learn more about this fail-safe way to dip with chocolate.
This recipe is part of our Annual Gygi Chocolate Extravaganza. Check out all the classes (hands on, demo and virtual options!)